Demo
Some of you have been asking questions about my process, brushes and what is the viewfinder that I'm referring to. Below is a demo and I will try to explain. I hope I answer your questions, if not please contact me and I will post more explanation.
The brushes in this demo are only 2 types.
WN = Artist Oil Brush, bright/short flat Winsor & Newton, England (hog bristle)
SW = Silverwhite series 1502 bright (synthetic)
This is the view finder that I use. I know it is kind of crude but I made it out of some scrap cardboard, punched holes at the 1/3 marks and strung heavy dark thread through the holes. The inside square is 4.5", I have one that is 6" but I find that it is too large because in order to crop or frame out what I'm looking at I have to hold it right up to the set up. That is not ideal.

This is me looking through the finder. I have to say that I had a hard time getting the camera to photograph exactly what I was seeing so you will have to just take my word for it when I tell you that the cherries lined up differently than what you see here. Also, a couple of times when I got up to take a photo I bumped the table and a few of the cherries scrambled. I tried to place them back in the right place. What can I say! One of the things that I decided on while looking through the viewfinder is the background paper split, I liked lining up the top of the paper on the 2/3 over mark and the bottom at the center between the marks.
I have been painting a medium grey acrylic (grey #6 by Golden) on my board (Ampersand Gessobord) to start. I like the way I can see the light and dark values more correctly, also it keeps the first layer of oil from soaking in too much and being too dry.

While holding the viewfinder in place I block in all the objects. I take about 5 minutes or so for this maybe 10 if it is more complicated. For this part I used a #6 SW, it is a synthetic and can make a thin line.
Here you can see the benefit of the grid. I put the objects down initially at random and then move my view finder around until I get a nice composition, sometimes moving an object slightly to make sense. Notice the cherry in the lower right, I placed my viewfinder so it centered it on the 1/3 over, 1/3 up mark (actually it was centered there, I just could not make it come out that way using the camera). The stem on the cherry above it is on the 2/3 up mark, the two cherries together are centered on the 2/3 up mark. The second cherry over on the right is just about centered on the 2/3 over, 1/3 up intersection.
There would be hundreds of ways to look at these same cherries with the exact set up and it all depends on where you stand how far you are from the set up. A slight movement can make it all look different.
I start with painting in the dark areas of the cherries, letting the brush sweep outside the lines. The brush I used here was a hog bristle, less precise #5 WN. Usually the dark areas are painted with the translucent paint, here I used Alizarin Crimson, Ultramarine blue, and a little Thalo blue to darken.

Painting the shadows, making them larger than they should be because I will be painting in the background and reshaping them. Brush: #5 WN, same as before.

Painted in the lighter areas on the cherries. These areas use more opaque paint that is why I do not do them first. Brush: a smaller #3 WN.

Painted in the green side starting with the bottom which was the darkest. You will notice that I painted out the stems. While I used the stems as part of the design while viewing and drawing in I don't feel the need to inhibit the loose painting style by painting around them, so I paint them out and will put them back in later. I usually work from dark to light on the background. Sometimes adding more light to the light areas as needed. While painting in the background I'm constantly redrawing and reshaping the objects. This is important, while you are painting you should be constantly analyzing and redrawing what you see. Notice how I redefine the shape of the cherries at this stage.
Brush: #5 WN.
Blocked in the grey area. using the same method and brush
I have put the stems back in using a #2 SW.
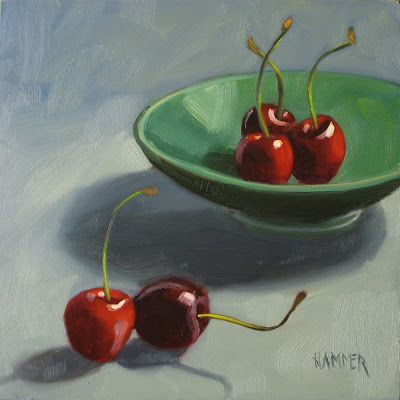
This is the final version. I have added small details such as highlights, reflected lights and stem details.
I hope this has been helpful.
My blog:
http://claudiahammer.blogspot.com
My website:
http://claudiahammer.com
My ebay store:
http://stores.shop.ebay.com/claudiahammer
My email:
iclaudiahammer@insightbb.com


.JPG)


